


Summary
On the Biovie blog, we often talk about sprouted seeds, algae, and superfoods, but fermentation is a fundamental pillar of living food that we haven't explored enough yet. Kombucha, this sparkling and slightly tangy drink that the Chinese call "the elixir of long life," has been part of our daily life with Aurélie for several years now.
When I first became interested in it, I was a bit intimidated. You read all sorts of things on the internet, some talk about dangerous molds, others about complicated processes requiring sophisticated equipment. In reality, making homemade kombucha is surprisingly simple once you understand a few basic rules. And that's precisely what I'm going to share with you today: everything you need to know to succeed in your first fermentation, avoid common beginner mistakes, and produce a delicious kombucha that you will be proud of.
€39.90
In stock
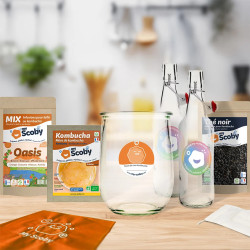
Complete Organic Kombucha Pack
Why make your own kombucha at home rather than buying it ?
The question is worth asking. After all, you can now find kombucha in almost every health food store, and even in supermarkets. So why bother making it yourself ?
The real benefits of homemade kombucha
Kombucha is a fermented beverage made from sweetened tea transformed by a symbiotic culture of bacteria and yeast, commonly known as SCOBY (Symbiotic Culture Of Bacteria and Yeast). This fermentation produces live probiotics, organic acids beneficial for digestion, antioxidant polyphenols from the tea, and B vitamins that contribute to normal energy metabolism.
If you would like to learn more about the properties of this ancient beverage, I invite you to read our detailed article on the 5 benefits of kombucha.
The problem with commercially available kombucha is that it is sometimes pasteurized for preservation and food safety reasons. However, pasteurization destroys a large portion of the live probiotics that are the main appeal of this drink. When you make your own homemade kombucha, you get a truly living beverage, with all its richness in beneficial microorganisms.
For my part, I have noticed a real difference in digestion between industrial kombucha and the one we prepare at home. The feeling of lightness after a meal is simply incomparable. Moreover, if you are interested in Benefits of fermented foods In general, you will understand why we are so attached to this practice.
The savings made: let's do the math
Let's be specific. An organic kombucha bottle in a store costs between 3 and 5 euros for 75 cl. If you consume it regularly, say one bottle per day, that amounts to between 30 and 50 euros per month.
With in-house production, here's what you actually spend:
- Organic tea: approximately €0.50 for 8 grams (enough to make 1 liter)
- Organic sugar: approximately €0.25 for 80 grams
- Filtered water: negligible
Less than 1 euro per liter for homemade kombucha, compared to 7 to 9 euros per liter in stores. The initial investment (SCOBY, jar, bottles) is recouped in just a few weeks. And then, there is the incomparable satisfaction of producing a quality drink yourself, knowing exactly what it contains.

The essential equipment (and what is optional)
No need to turn your kitchen into a laboratory. The necessary equipment is simple and probably already partly in your cupboards.
The kombucha mother (SCOBY): where to find it ?
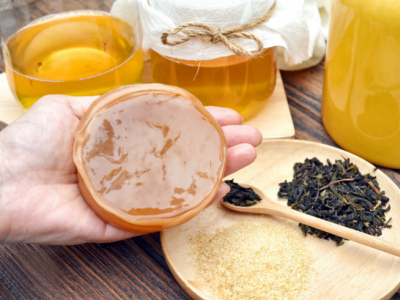
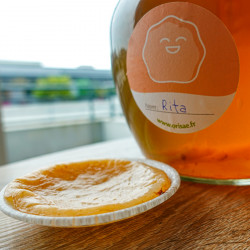
The SCOBY is the heart of your kombucha production. It is this gelatinous disc, often beige or slightly brownish, that floats on the surface and transforms your sweet tea into a fermented drink. Without a SCOBY, there is no kombucha.
You have several options to get one:
- Receiving one from a friend who is already brewing (the SCOBY reproduces with each fermentation)
- Purchase it from a trusted supplier.
- Make it yourself from a store-bought unpasteurized kombucha bottle (allow 2 to 4 weeks).
At Biovie, we offer Quality SCOBY, sourced from healthy and vigorous cultures. Each kombucha mother is accompanied by its starter liquid, essential for starting your first fermentation under the best conditions. For more details on maintaining your culture, consult our guide on how to make and feed a kombucha mother.
€15.90
In stock
Organic Kombucha Mother
The ideal jar: glass, volume, opening
The choice of container is more important than one might think. Here are the essential criteria:
The material : Glass is essential. Kombucha is acidic, and this acidity can react with metal or certain plastics, releasing undesirable substances into your drink. Glass is inert, easy to clean, and transparent, allowing you to monitor the progress of your fermentation.
The volume To start, a jar of 2 to 3 liters is ideal. Large enough to produce an interesting quantity, but not too cumbersome to handle easily.
The opening : Favor a wide opening. This makes cleaning easier and especially the handling of the SCOBY, which can become quite large over time.
Quality water: the overlooked secret of beginners
Here is a point that many guides overlook, yet it is crucial. Tap water contains chlorine, which is added to eliminate bacteria. However, your SCOBY is made up of beneficial bacteria that you want to preserve !
Chlorine can weaken your SCOBY, slow down fermentation, or even cause it to fail completely. It's one of the most common mistakes made by beginners, and often they don't understand why their kombucha isn't working.
Solutions:
- Let the tap water sit for 24 hours in an open container (the chlorine evaporates).
- Use bottled spring water
- Filter your water with a suitable system
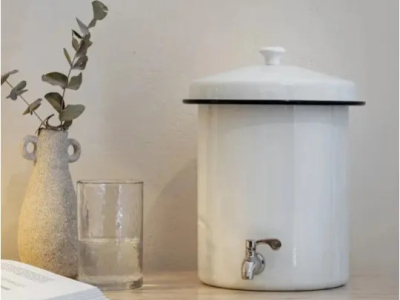
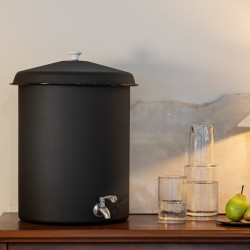
We personally use a Ecofiltro filter at home, which removes chlorine while retaining the beneficial minerals in the water. It's an investment that serves well beyond kombucha: for tea, cooking, and all our daily consumption.
The basic ingredients and their precise measurements
The basic recipe for kombucha is remarkably simple: tea, sugar, water, a SCOBY, and starter liquid. That's it.
Tea: black, green, or blend ?
The SCOBY primarily feeds on the tannins and caffeine present in tea. This is why black and green teas are most recommended for beginners.
Black tea : Gives a bolder kombucha, with malty notes. It's the traditional choice, the one that best nourishes the SCOBY.
Green tea : Produces a lighter and more delicate kombucha, with herbal notes. Excellent for summer.
50/50 Mix : It's our preference with Aurélie. We achieve a nice balance between body and freshness.
To avoid when starting: flavored teas (essential oils can disrupt the SCOBY), pure herbal teas (not enough nutrients), and decaffeinated teas.
Sugar: Quantity and Alternatives
The sugar is not there to sweeten your final drink, but to feed the SCOBY. During fermentation, the yeasts convert the sugar into alcohol, then the bacteria transform this alcohol into organic acids. At the end of the process, there is very little sugar left in your kombucha.
Use regular white sugar or light cane sugar. Avoid honey (due to its antibacterial properties), agave syrup, or sweeteners that are not suitable for the SCOBY.
The standard amount is 70 to 80 grams of sugar per liter of water. Less sugar will result in a slower fermentation and a less fizzy kombucha. More sugar does not significantly speed up the process and can unbalance your SCOBY.
Dosages according to volume
Here are the proportions for different volumes, which you can adjust according to your needs:
For 1 liter:
- 1 liter of filtered water
- 8 grams of tea (about 2 teaspoons)
- 80 grams of sugar
- 10 to 15 cl of starter liquid
- 1 SCOBY
For 2 liters:
- 2 liters of filtered water
- 16 grams of tea
- 160 grams of sugar
- 20 to 30 cl of starter liquid
- 1 SCOBY
For 3 liters:
- 3 liters of filtered water
- 24 grams of tea
- 240 grams of sugar
- 30 to 45 cl of starter liquid
- 1 SCOBY
For 5 liters:
- 5 liters of filtered water
- 40 grams of tea
- 400 grams of sugar
- 50 to 75 cl of starter liquid
- 1 SCOBY (or 2 to speed up)
The 7 detailed steps to successfully make your kombucha
Now that you have all the equipment and ingredients, let's move on to the practice. Follow these steps to the letter for your first fermentation, and you can then adjust according to your preferences.
Step 1 – Prepare the sweet tea (10 minutes)
Heat your water until it simmers (no need for a full boil). Add the sugar and stir until completely dissolved. Then add the tea and let it steep for 10 to 15 minutes. The tea should be stronger than for normal consumption, as it will be diluted by fermentation.
Strain the tea to remove the leaves. At this stage, you have a very concentrated sweet tea.
Step 2 – Cool completely (patience required)
This is the stage where many beginners make a fatal mistake: they add the SCOBY to tea that is still warm. However, a temperature above 30°C can damage or even kill the microorganisms in your SCOBY.
Let your tea cool to room temperature, ideally below 25°C. This may take several hours. You can speed up the process by placing your container in a cold water bath, but never put hot tea in the refrigerator (thermal shock).
Step 3 – Add the SCOBY and the starter
Once the tea has cooled, pour it into your glass jar. Add the starter liquid (mature kombucha from the previous fermentation or the one provided with your SCOBY). This acidic liquid is essential: it lowers the pH and protects your preparation from contamination during the first few days.
Gently place the SCOBY on the surface. It doesn't matter if it sinks at first, that's normal. A new SCOBY will form on the surface in the following days.
Step 4 – Install and cover the jar
Cover the opening of the jar with a breathable fabric (cheesecloth, clean dish towel, coffee filter) and secure it with a rubber band. The SCOBY needs oxygen to work, but you need to prevent dust and insects from getting in.
Place the jar in a location:
- At a stable temperature, between 20 and 27°C (the ideal being 24-25°C)
- Out of direct sunlight
- Without vibrations (avoid the top of the refrigerator or near the washing machine)
- With good air circulation
Step 5 – Fermentation F1 (7 to 14 days)
Now, you have to wait. This is the hardest part for the impatient! During this period, resist the temptation to move the jar or touch the SCOBY.
What happens in your jar day after day ?
Days 1-2 : Few visible changes. Maybe a few small bubbles. Don't panic if nothing seems to be happening.
Days 3-5 A new SCOBY begins to form on the surface. Initially translucent and thin like a film, it gradually thickens. CO2 bubbles appear.
Day 7 It's time for the first taste test. Use a straw to take a little liquid (by dipping it under the SCOBY) and taste it. The kombucha should be slightly tangy and fizzy, with still a hint of sweetness.
Days 10-14 Kombucha becomes more and more acidic. It's up to you to find the balance point that suits you. The longer you wait, the more vinegary it will become.
The fermentation duration depends on the temperature: the warmer it is, the faster it goes. In summer, 7 days may be enough. In winter, expect around 14 days.
Step 6 – Taste and decide
When the taste suits you (neither too sweet nor too sour), it's time to take action. You have two options:
Option 1: Consume naturally - Remove the SCOBY and a portion of the liquid (your starter for the next batch), then bottle your kombucha directly. Store in the refrigerator.
Option 2: Initiate a second fermentation (F2) - This is the step that will add more fizz and allow you to flavor your kombucha. I'll explain right after.
Step 7 – Bottle or launch the F2
If you choose direct consumption, use glass bottles with airtight seals. Kombucha can be stored for several weeks in the refrigerator, or even several months if the cold is stable.
Always keep 10 to 15% of the volume as a starter for your next fermentation, and store your SCOBY in this liquid until the next brewing.

The second fermentation (F2): bubbles and flavors
F2 is the cherry on top. This optional step allows you to achieve a naturally sparkling kombucha and add flavors to it.
How to succeed in your F2 in 3 days
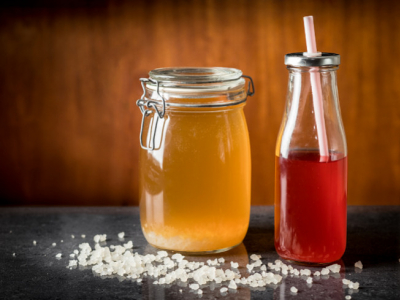
The principle is simple: you bottle your kombucha in airtight bottles with a bit of sugar or fruit. Fermentation continues in a closed environment, the CO2 cannot escape and dissolves in the liquid. The result: bubbles !
- Fill your bottles with plain kombucha, leaving 5 cm of space at the top.
- Add your flavoring (see recipes below)
- Seal tightly
- Leave at room temperature for 2 to 4 days
- "Burp" daily (briefly open to release pressure)
- Transfer to the refrigerator when the level of fizz is to your liking.
Caution: F2 can create a lot of pressure. Use bottles designed for fermentation (such as mechanical stopper lemonade bottles) and always open them over the sink.
5 simple flavoring recipes
Fresh ginger : 1 teaspoon of grated ginger per bottle. Our favorite !
Red fruits : 2-3 tablespoons of crushed raspberries or blueberries.
Lemon-mint The juice of half a lemon and a few mint leaves.
Sugar apple : 2 tablespoons of organic apple juice and a pinch of cinnamon.
Tropical : 2 tablespoons of pineapple or mango juice.
The star recipe: ginger-lemon
This is the combination we prepare most often at home. The ginger adds a kick and promotes carbonation, while the lemon adds freshness.
For a 75 cl bottle:
- 1 teaspoon of freshly grated ginger
- The juice of a quarter of a lemon
- 1 teaspoon of sugar (optional, for more bubbles)
Mix, close, wait 2-3 days, and enjoy well chilled !
The 10 Fatal Mistakes of Beginners (and How to Avoid Them)
Over the years and through interactions with our community, I have identified the mistakes that occur most frequently. Knowing them will save you from many disappointments.
Error 1: Using chlorinated tap water
Chlorine kills the good bacteria in your SCOBY. Solution: filtered water, spring water, or tap water left to stand for 24 hours.
Error 2: Pouring the still hot tea over the SCOBY
Above 30°C, you risk killing your culture. Solution: always check the temperature before adding the SCOBY.
Error 3: Not adding enough starter liquid
The starter acidifies the environment and protects against contamination. Solution: always use 10 to 15% of the total volume.
Error 4: Temperature too low
Below 18°C, fermentation slows down dangerously and the risk of mold increases. Solution: find the warmest spot in your house, or use a heating mat.
Error 5: Moving the jar during fermentation
The new SCOBY in formation is fragile. Moving it can cause it to sink and disrupt the process. Solution: find the ideal location BEFORE starting.
Error 6: Using metal utensils or containers
The acidity of kombucha reacts with metal. Solution: glass, wood, food-grade plastic, or silicone only.
Error 7: Seal tightly during the F1
The SCOBY needs oxygen. Solution: always use a breathable cloth for the first fermentation.
Error 8: Putting the SCOBY in the refrigerator
The cold puts the SCOBY into dormancy and weakens it in the long term. Solution: keep it at room temperature in mature kombucha.
Error 9: Fermentation too short
A kombucha that is too sweet has not finished its transformation and contains fewer probiotics. Solution: wait at least 7 days before the first test.
Error 10: Using herbal teas instead of tea
Herbal teas do not contain the nutrients that the SCOBY needs. Solution: black or green tea only for beginners.
Mold or normal SCOBY? The visual guide
This is THE big concern for beginners. "Is my SCOBY contaminated?" Here's how to tell the difference.
What does mold (danger) look like?
Mold on kombucha is always visible ON THE SURFACE, never submerged. It looks exactly like the mold you know on bread or fruit:
- Fluffy, with filaments
- Colorful: green, blue, black, cottony white
- Located at a point that extends
If you see this, unfortunately, you need to throw everything away: the liquid AND the SCOBY. Thoroughly clean your jar with white vinegar before starting again.
Normal Aspects of SCOBY (Don't Panic)
Many perfectly normal things can seem worrisome:
- Brown spots: these are yeast residues, completely harmless
- Bubbles or bumps: the escaping CO2
- Brownish filaments hanging: yeast colonies, a sign of good health
- SCOBY sinking to the bottom: normal, especially at the beginning
- New SCOBY thin and translucent: it will thicken
- Irregular, rough surface: each SCOBY is unique
The golden rule: if it's below the surface or if it's smooth and gelatinous, it's probably normal. If it's on the surface, fluffy and colored, it's mold.
What to do if your kombucha is contaminated
In case of confirmed mold:
- Do not taste
- Throw out all the contents of the jar.
- Throw away the SCOBY (impossible to save once contaminated)
- Wash the jar with very hot water and white vinegar.
- Rinse thoroughly
- Start again with a new SCOBY and analyze what might have caused the contamination (temperature too low? not enough starter? unclean utensils?)
Conservation and maintenance of your SCOBY
Your SCOBY is a living organism that deserves a little attention between brews.
Store the finished kombucha
Once bottled, your kombucha can be stored:
- In the refrigerator: several weeks to several months
- At room temperature: a few days (fermentation continues slowly)
The cold significantly slows down fermentation and preserves the flavor you have chosen.
Keeping your SCOBY between brews
If you take a break between two productions:
- Leave the SCOBY in mature kombucha (never in water)
- Keep the jar covered with a cloth at room temperature.
- Feed it by adding a little cooled sweet tea every 2-3 weeks.
A well-maintained SCOBY can live for years, even decades.
Multiply and share your SCOBYs
With each fermentation, a new SCOBY forms on the surface. You can:
- Stacking them (up to 4-5 layers work well together)
- Separate the layers and offer them to your loved ones.
- Compost the oldest ones (they are excellent for the garden)
Sharing SCOBYs is also about sharing a passion for living foods. This is how this culture has been passed down for centuries.
Frequently Asked Questions About Homemade Kombucha
How long does it take to make homemade kombucha ?
The first fermentation (F1) takes 7 to 14 days depending on the temperature. The second fermentation (F2) adds 2 to 4 days. In total, expect 10 to 18 days from start to tasting.
Is homemade kombucha dangerous ?
No, if you follow basic hygiene rules and use quality ingredients. The acidic pH of kombucha (around 3) prevents the development of pathogenic bacteria. Millions of people consume it daily without any issues.
Is it possible to make kombucha without a mother ?
Technically yes, starting from a store-bought unpasteurized kombucha bottle. But it takes longer (2-4 weeks to develop a SCOBY) and is less reliable. I really recommend starting with a quality SCOBY. If you are looking where to buy a kombucha mother, we offer them in the shop.
What is the difference between F1 and F2 ?
The F1 (first fermentation) transforms the sweet tea into kombucha using the SCOBY, in an open jar with oxygen. The F2 (second fermentation) is done in a closed bottle, without the SCOBY, to create carbonation and add flavors.
Can you drink kombucha while pregnant ?
Kombucha contains a small amount of alcohol (0.5 to 2%) naturally produced by fermentation. As a precaution, pregnant or breastfeeding women should consult their doctor. The same applies to immunocompromised individuals.
Why is my kombucha not fizzy ?
Several possible causes: F1 fermentation too long (not enough sugar left), non-airtight bottles for F2, temperature too low, or not enough sugar/fruit added in F2.
How much kombucha can one drink per day ?
There is no absolute rule, but start slowly if you are not used to fermented foods. A glass (20-30 cl) per day is a good starting point. Some people drink more without any issues, so adjust according to how you feel.
What is the difference between kombucha and kefir ?
These are two different fermented drinks. Kombucha is made from sweetened tea, while kefir can be made from milk or sweetened water. To learn all about these two drinks, check out our detailed comparison on the Differences between kombucha and kefir.
In conclusion
Making your own kombucha at home is a way to reconnect with the ancient tradition of fermentation while having complete control over what you consume. It is also an ecological approach (no more bottles to buy and recycle) and economical (less than 1 euro per liter).
Honestly, once you've tasted your first homemade production, you won't go back. The satisfaction of seeing your SCOBY thrive, discovering new flavor combinations, sharing your cultures with loved ones... It's much more than just a drink, it's a whole way of life.
If you wish to explore other fermented beverages, I also recommend our guide for make homemade fruit kefir, another wonder of fermentation.
So, ready to get started? Feel free to share your experiences in the comments, both your successes and your questions. The Biovie community is here for that.
And if you're looking for a quality SCOBY to start with, suitable organic teas, or simply some advice, you know where to find us !
Try it, and you'll love it !